
EgiGeoZone - Quick guide
Understanding
The EgiGeoZone app does not determine the location, which is necessary for entering / leaving a zone. Instead the Google Geofence Service is used, which informs the app, if an entering / leaving is detected. Then the app can perform the actions. This service should be on each device, that has Google Services installed. If sometimes the entry / exit event are reported incorrectly, or even not reported at all from the Google Geofence Service, then you are in a difficult area, in which the location can not be determined correctly. This is not a problem with the app!
Preconditions
For a proper use of the EgiGeoZone app, some settings are necessary. This will now be described below.
App permissions for Android 6+
If you have Android greater than or equal version 6, you should allow after installation and before the first start of the app EgiGeoZone all the required permissions. These can be found under Settings --> Application Manager or Apps --> EgiGeoZone --> Permissions.
Example:
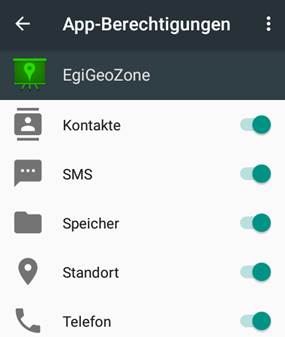
The permissions required by the app are explained in detail here: manual
Location settings
In order the app can be used effectively, the location detection must be activated. These can be found here: Settings --> Location --> Mode. To achieve the best results, select the high accuracy. Do not worry, you will not notice the battery consumption.
Since the conditions were met, you can now launch the app.
Create new zones
My first GeoZone
When you start the app for the first time, you will see an empty zone list. In order for the app to do something useful, you must create at least one zone. You can create a GeoZone by clicking on this + icon.
Tip:
To see a reaction at configuration time
of the
zones and the subsequent tests, you should turn on
the notifications under administration!
You have to set the following fields to configure a GeoZone:
-
GeoZonen name: The name
of the zone.
-
Latitude
and
longitude:
You can enter the coordinates, select them
on the map, or
let them begenerated via the menu item "Current
coordinates".
-
Radius:
You have to enter a
radius in meters. Do net set the radius
too low. A good start would be 500 meters.
-
Location accuracy:
This value is intended for special and difficult
environments. Normally, you should leave the default value of 0
meters here. The use of location accuracy
can "swallow" events!
For details see the manual.
After that you can save the
zone. You will be shown the newly created
zone in the zone list. Before the zone you see a red or green icon.
Red means that you are outside the zone and green that you are
within the zone.
If you, as described above, turned on the
notifications and you are just now in the applied area, you should
now get a notification after a few seconds on your device.
Tip:
By selecting the zone and clicking on "Alter"
you can repeat the test again. This only applies to a zone in which
you are currently located with the device.
Profiles
To perform more complex actions, different profiles can be coupled to a zone. These profiles are then, when the entering / leaving event occurs, executed.
Following profiles are available:
- Server profile: Here you can call up a special URL on a server
- SMS profile: Send short text messages (SMS)
- Email profile: Send email
- Profile for more actions: Turn on or off WiFi, Bluetooth and sound, call a task of "Tasker" app and others.
- Profile for conditions: Here conditions can be set, which will be considered at execution time.
Create a profile
To create a profile, click
on the menu item Profile or click this
icon
![]() and create your profiles.
and create your profiles.
Tip:
Separately from the geofence events you
can test a
server, SMS or email profiles, by
clicking the test button.
Use of profiles in the zones
Now that you have created the required profiles, this can be referenced in the zones now. To do this, select the zone from the list. Down at the profiles, you can now select the desired profiles. Then click an on the "Alter" button. If the profiles have been configured correctly, they should, if you are in the zone just to run.
Tip: You may copy a zone or a profile, by assigning it a new name.
Read more here in the manual.